

Web Automation using Puppeteer
Learning Web Scraping and Automation with help of Puppeteer


Table of contents
Recently, I wanted to gather some data from Google for research and analysis purposes based on search results for different keywords.
Google.com doesn't have any API which gives us the data we need, because sometimes it can be raw or unstructured data that we want to research. So I thought to go with the form of web automation to capture that information.
Introduction
Website automation is a way to automate common web actions like filling out forms, clicking buttons, downloading files, and passing them to helpful software bots. The Internet makes doing business faster and easier in countless ways, but these actions can be time-consuming and error-prone.
However, sometimes it gets related to web scraping because we want some data from some websites/application which is not exposed through API for some research purposes.
Puppeteer is one such tool that is powerful when it comes to web automation. I thought of Selenium, but I thought in terms of setup and learning curve I went ahead with Puppeteer. Puppeteer though only works on Chrome or Chromium, so if your application supports other browsers, selenium can be a good option too.
As per an official,
Puppeteer is a Node library that provides a high-level API to control Chrome or Chromium over the DevTools Protocol. Puppeteer runs headless by default, but can be configured to run full (non-headless) Chrome or Chromium.
Getting Started
Starting with Puppeteer is quite straightforward. We just need to install the Node library and we are ready to go.
We will first initialize the node project with npm init -y, then
npm i puppeteer
Above will install Puppeteer, and it will be ready to use.
Once done we will import Puppeteer as below:
const puppeteer = require('puppeteer')
We will now launch Browser in headless mode, and create a page/tab in that browser. (NOTE: Puppeteer functions return Promise, as they work in async fashion so we will write all code in async function block and call in IFFE[iffy] mode)
const browser = await puppeteer.launch();
const page = await browser.newPage()
Once we have a page created, we will use goto API on that to navigate to a page. In this case, we will use automationpractice.com/index.php which can be used for demo purposes.
We will just navigate to a page and take a screenshot of it as below
const url = 'http://automationpractice.com/index.php';
await page.goto(`${url}`)
await page.screenshot({ path: `screenshots/landing_page.png`, fullPage: true })
If fullPage attribute is not passed, it will take only a screenshot of the visible viewport.
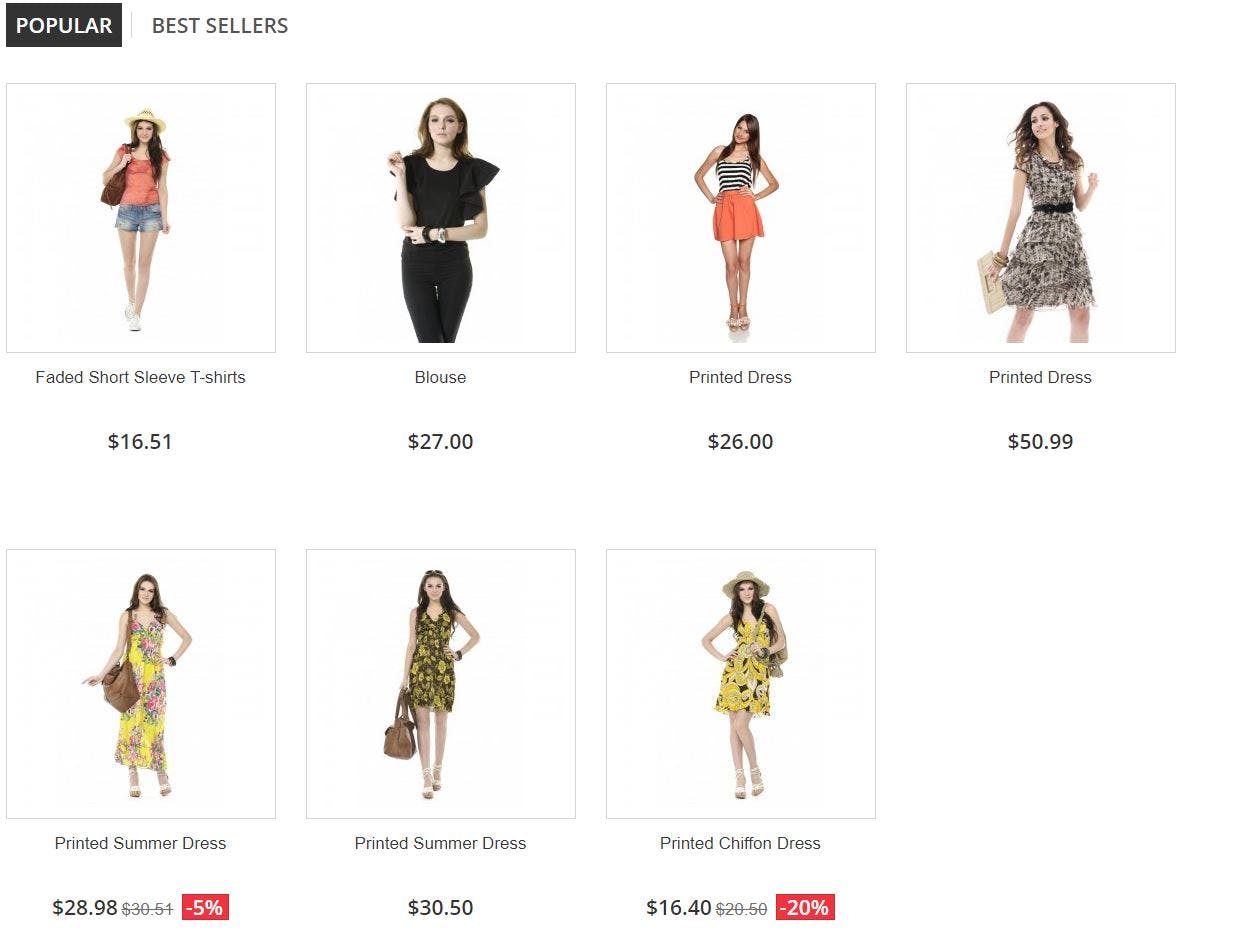
Now what we will try to do over here is, we will try to extract the Product name and prices from the Popular tab as below.
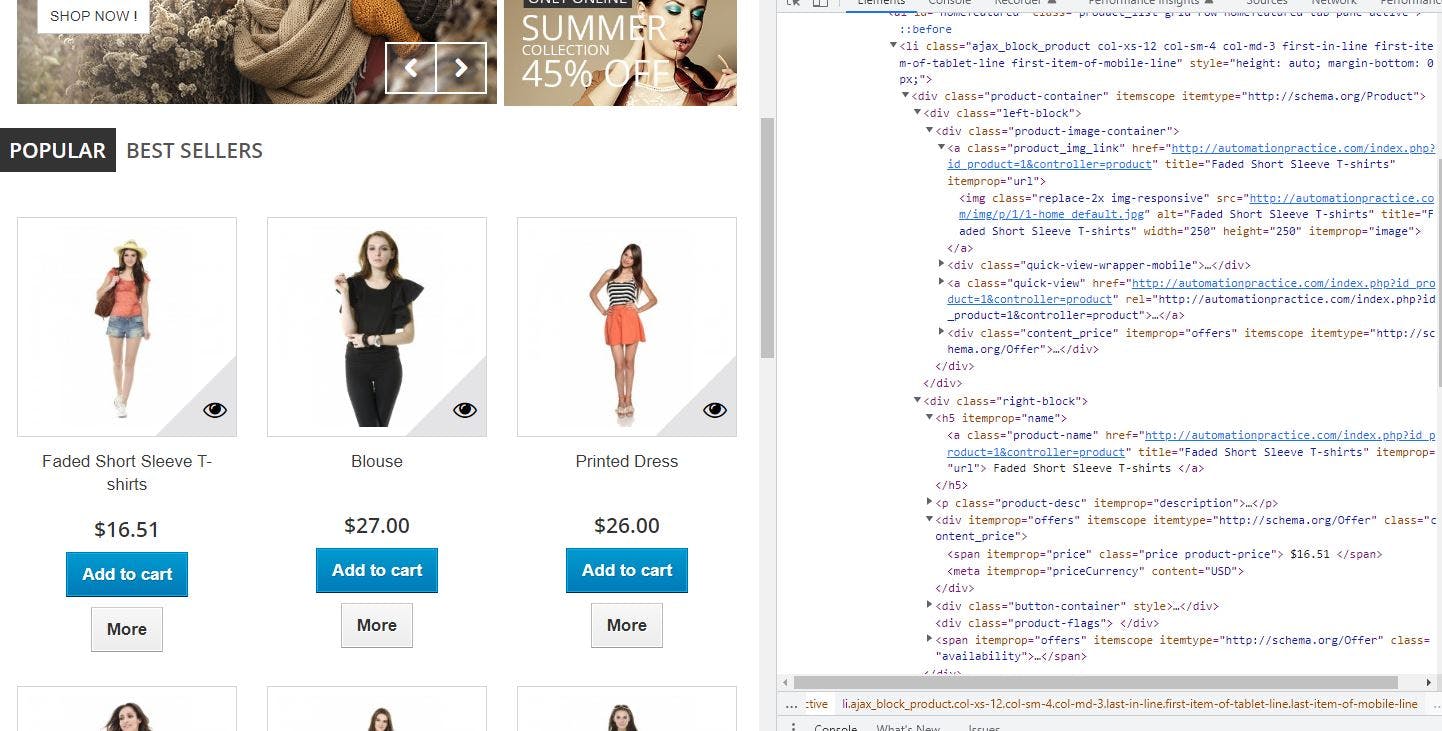
To do that, we need to how to capture the CSS selector which can be used with DOM API to extract the information we need.
If we inspect the above element, we know it's <ul> with an id of homefeatured. And then it consists <li> which represents each product.
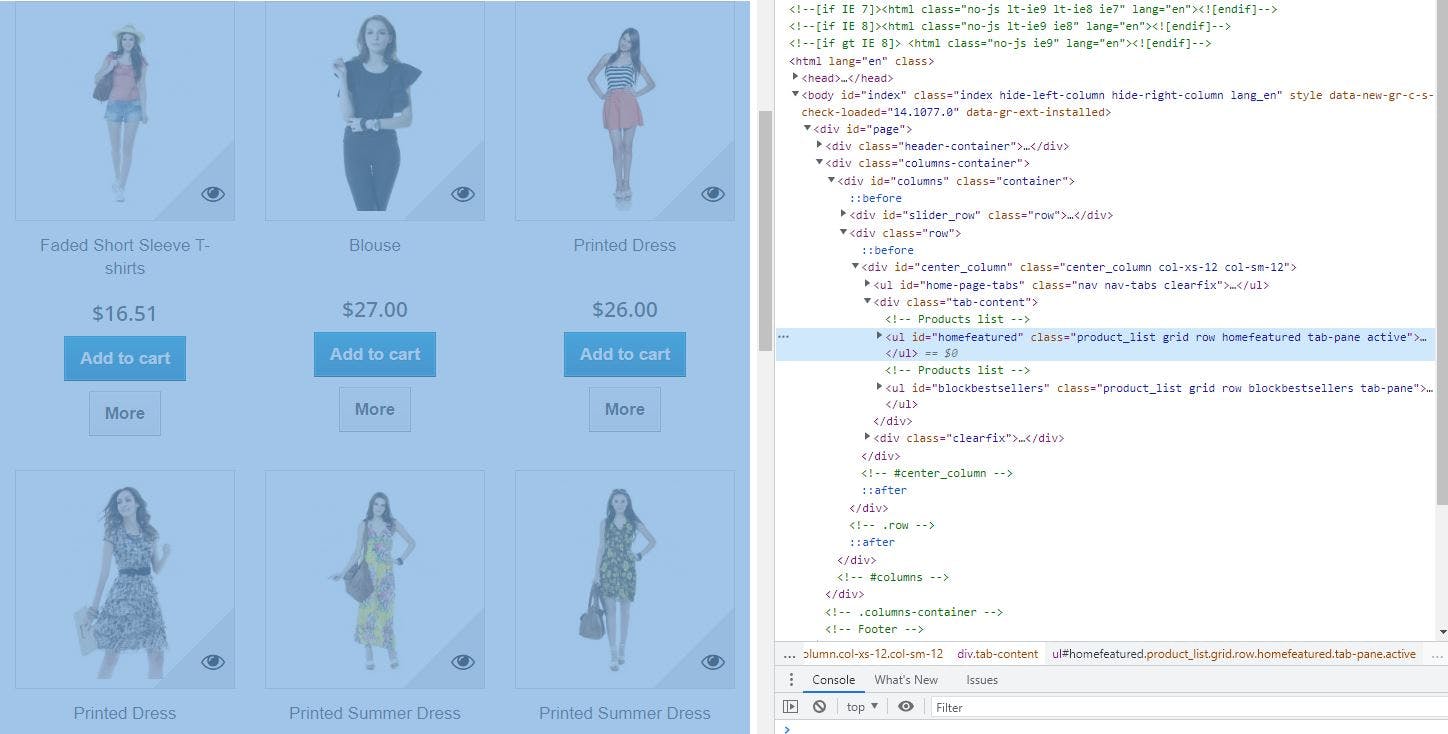
We need to traverse to individual <li> then visit <div> block with class of right-block and then get content of <a> within <h5> tag to extract name. Similarly continuing within the same <div> block we need to visit <div> with the attribute of itemprop with the value of offers, then extract the contents of <span> element with attribute itemprop having the value of price.
To do this we will use evaluate the method of page API as below, whatever you are within is all on the browser side. It returns DOM for the page being evaluated, against which then we can use DOM APIs to extract the information we need.
var productNames = await page.evaluate(() => {
        var ulEl = Array.from(document.querySelectorAll("ul#homefeatured"))

        var names = []
        var liEL = ulEl[0].getElementsByTagName("li")
        for (var i = 0; i < liEL.length; i++) {
            names.push({
                product: liEL[i].getElementsByClassName("right-block")[0].getElementsByTagName("h5")[0].getElementsByTagName("a")[0].text.replace(/\t/g, '').replace(/\n/g, ''),
                price: liEL[i].getElementsByClassName("right-block")[0].querySelector('div[itemprop="offers"]').querySelector('span[itemprop="price"]').innerText
            })

        }
        return names
    });

    // print extracted product names and its price.
    console.log(productNames)
If we want to debug what is happening in a browser using console.log within page.evaluate method you need to pass the below argument during launch else we won't be able to see outputted console logs in the NodeJS application.
const browser = await puppeteer.launch({ dumpio: true });
Now we will Puppeteer to perform Click, we will click on Sign in Link on the top right corner.
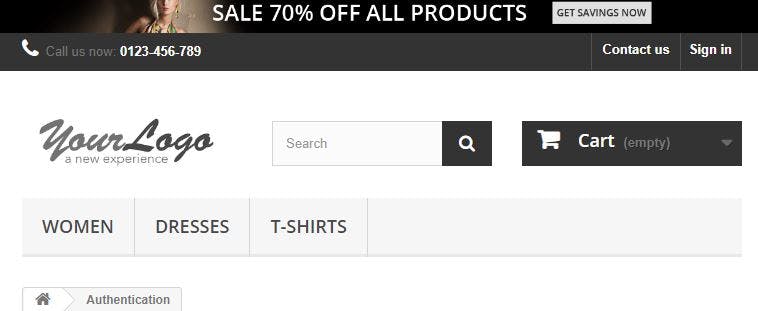
Navigation is slow, so to verify if the click is worked we will wait for the selector in this case <form> with the id of create-account_form which will assert we are on the Sign In page.
Post that we will also print out the current page we are on, which should be automationpractice.com/index.php?controller.. which is a sign-in page.
await page.click("a.login");
await page.waitForSelector('form#create-account_form');
console.log(page.url()) # http://automationpractice.com/index.php?controller=authentication&back=my-account
There are other lots of functionalities of filling out a form etc. But this article would give an idea of how easy its to start with Puppeteer. Link for APIs and other resources are given in the Resources section below.
Full Code
Full code is available here on GitHub
const puppeteer = require('puppeteer')

const scrapeWebpage = async () => {

    console.log('Launch Browser and Create tag cum page')
    const browser = await puppeteer.launch({
        dumpio: true
    });
    const page = await browser.newPage()

    // visit page
    const url = 'http://automationpractice.com/index.php';
    await page.goto(`${url}`)

    // take screenshot
    await page.screenshot({ path: `screenshots/landing_page.png`, fullPage: true })

    // evaluate page
    var productNames = await page.evaluate(() => {
        var ulEl = Array.from(document.querySelectorAll("ul#homefeatured"))

        var names = []
        var liEL = ulEl[0].getElementsByTagName("li")
        for (var i = 0; i < liEL.length; i++) {
            names.push({
                product: liEL[i].getElementsByClassName("right-block")[0].getElementsByTagName("h5")[0].getElementsByTagName("a")[0].text.replace(/\t/g, '').replace(/\n/g, ''),
                price: liEL[i].getElementsByClassName("right-block")[0].querySelector('div[itemprop="offers"]').querySelector('span[itemprop="price"]').innerText
            })

        }
        return names
    });

    // print extracted product names and its price.
    console.log(productNames)

    // Navigate to Sign In Page http://automationpractice.com/index.php?controller=authentication&back=my-account
    await page.click("a.login");
    await page.waitForSelector('form#create-account_form');
    console.log(page.url())

    // close browser, else program will keep running.
    await browser.close()
}

(async () => {
    await scrapeWebpage();
})();
Bonus
Web scraping pages may result in blocking your IP from sites that we are hitting as it may be suspicious activity from their point of view and may result in bringing down the website or application.
So to avoid most developers using rotating proxies, every request sent via the automation tool acts like a different machine or user.
Puppeteer has out-of-box support for proxy.
It's easy to set up, during the launch of the browser pass proxy as below
const browser = await puppeteer.launch({
            args: [`--proxy-server=http://<ip/hostname>:<port>`],
});
If it's authenticated proxy, we can pass username and password before we call page.goto() API using the below API
await page.authenticate({ <proxy-username>, <proxy-password> });
await page.goto('http://example.com')
Plugins
Puppeteer has a lot of plugins to help with a lot of the above kinds of issues and much more to give out-of-box functionality. This plugin includes things like
- Avoiding bot detection
- Ad Blocker
- Solve reCAPTCHAs and hCaptchas
- Anonymizes the user-agent on all pages.
puppeteer-extra provides that modular plugin framework for the puppeteer, through which we can inject these plugins and make life as a developer easy. A list of plugins is available here
Resources
Thank you for reading, If you have reached it so far, please like the article, It will encourage me to write more such articles. Do share your valuable suggestions, I appreciate your honest feedback and suggestions!